Pages

Wednesday, June 6, 2012

Pillows!


I am not very good at sewing. I make things that I don't have to follow patterns! These pillow covers really were very easy. I was pretty much winging it and that is just how I sew because I am not good at math. Sorry ahead of time for the lack of measurement numbers! Just measure the size of your pillow and add an inch to the length and width. When I bought my fabric I had them cut the perfect length and then the fabric was just about the right size to fold over the pillow with a little extra for the opening. Sew a hem on each of the short sides.


Fold the length right sides together almost in 3rds. Pin and sew 1/4 on each open side.


Turn right side out and sew 1/4 hem all the way around if you want to. I didn't but it would reinforce the seams. I really couldn't fit it as most of them came out a little small (I am not very good at measuring either it seems!) and I was trying to knock out 6 pillows in one naptime! It took a little longer but not much.


Stuff your pillow in the open flap and viola! A pillow cover! I was so happy to cover the pillows that came with our couch. They were just dark and too matchy for me. Keep in mind that the pillows may be stuffed with different amounts of stuffing so they may be different sizes.....this happened to me and some of my covers were very very snug! Oh well, next time I will measure each of them. 


Wednesday, May 30, 2012

Project: Lotion Bars


The thing about El Paso is it is really dry. My skin is even oily and I am still dry to the point that I get cracked skin and Kady gets excema regularly. I have tried regular lotion, natural lotion and even prescriptions. They either make us itch more, burn or plain don't work. So after my desperate, last minute mix of coconut oil and shea butter soothed Mackynzie's diaper rash when nothing else did I thought this recipe might be worth a shot. The beeswax is added to harden the oils, but once you hold the bar in your hand it melts enough to put on easily. 

 Natural, easy to make and perfect for little hands.

Equal parts coconut oil, shea butter and beeswax. I melted the ingredients in a "double boiler".


Then I poured them in a mini muffin pan sprayed with vegetable oil.


It only took about 15 minutes to set and then I popped them in the freezer for about 5 minutes so they pulled away from the pan. They came right out and Kady couldn't wait to try one. She approves. So do I! No more lotion from the pump all over the bathroom sink! I would use this for really thirsty skin....not for a light lotion. I will work on a recipe for that and keep you posted!


Thursday, May 17, 2012

Project: Homeschool Station


When I started homeschooling Kady I had to come up with a way to store our work and supplies. This is my solution. It is kinda pretty as well as kind of organized since it sits right in our kitchen!


The board is adapted from http://www.1plus1plus1equals1.com/Calendar2.html. We also use their wipe-off Calendar Notebook ideas. The big pages are Bible verse lessons and a song. The smaller ones are the basic foundations of our week but I don't focus too much on them. Just a guide. She uses the notebook for these things as well as ABC's and counting, month, day, year and shapes and shape drawing.

The cart used to be a basic white cart. I painted it gray-brown and added chalkboards on both sides (mostly to entertain Kynzie while helping Kady!)


Inside we use a workbox system. The bottom shelf has learning toys for Kynzie and the top has Kady's to do boxes. I only use 3 for Kady because most of the stuff I have to keep up high away from little inquisitive hands! The drawer holds supplies that are easy to get for Kady whatever her project is. Everything has a place and she is good at putting things away when she knows where they go! Less clean up for me. My coat closet also holds a hanging shoe organizer that keeps my stuff up high, but that is not very neat yet so that post will have to wait!


Wednesday, May 16, 2012

What I use to clean my house and Why!


 My order arrived from Shaklee yesterday and I am very excited...one because I am completely out of fish oil and two because I am also tired of these awful bumps on my hands from using a store bought dish soap. I really can't use many commercial products because either myself or one of my children are sensitive to them. I ordered Basic H, Laundry Brightner because I don't like the smell of bleach, dish soap, fish oil, and cleaning supplies.


I love the Basic H and the spray bottles because they come labeled and tell you how much to use for each purpose. Oh and because they are soooo pretty. I even left them out on my window sill because they make me smile. Mom....notice the ladybug! Love it!


I filled all three bottles per directions and I only used that much of the Basic H! For 3 bottles of cleaner! This stuff is going to last forever. I will have to put it my suitcase to ship it to Hawaii in the winter.

So far, so good. Kady used the window cleaner formula to clean our super dirty back door which is covered in dog slime and she got it clean so fast I had to give her another job to do. Yes.....my 4 year old cleans and does chores and she HATES the smell of vinegar! Reason number three I am glad this shipment came! (My husband will be happy to not come home to a house that smells like vinegar also! I used to try to clean only when he was gone because he dislikes it so much!) It is nice to be able to let her help clean and not have to worry about toxic chemicals going into her little hands.....or feet or arms....where ever it may end up!

Click here to check out the Shaklee website. You can order on that page or contact me and I can help you!


Saturday, May 12, 2012

Project: Mantel

Love, love, love the little H with the burlap flower. After I made it I thought....OH I LOVE IT! Matt will hate it! Maybe not......I really like them all grouped together....Kady likes the jute H. She made her own monogram while I made these...


My mantel was pretty bare. The mirror, the baskets, a candle and some German beer mugs I love that my Grandpa gave me. Don't worry Gramps they are right next to the mantel on the book shelf!

So I added a few things....only bought the 3 H's from Joann's for about $3! Had the other stuff kinda laying around. I really like the finished product...it is me and that is what really matters....


Saturday, May 5, 2012

Fun pizzas for the family


These pizzas are so easy to make and a blast for my 4 year old. It just feels special to have your very own pizza.


I use a crust recipe from here.


Recipe: PW’s Favorite Pizza

| | |
Ingredients
  • FOR THE CRUST (MAKES TWO CRUSTS):
  • 1 teaspoon Active Dry Or Instant Yeast
  • 4 cups All-purpose Flour
  • 1 teaspoon Kosher Salt
  • 1/3 cup Extra Virgin Olive Oil

Preparation Instructions

TO MAKE THE CRUST:
Sprinkle yeast over 1 1/2 cups warm (not lukewarm) water.
In a mixer, combine flour and salt. With the mixer running on low speed (with paddle attachment), drizzle in olive oil until combined with flour. Next, pour in yeast/water mixture and mix until just combined.

Coat a separate mixing bowl with a light drizzle of olive oil, and form the dough into a ball. Toss to coat dough in olive oil, then cover the bowl tightly with plastic wrap and store in the fridge until you need it. ***It's best to make the dough at least 24 hours in advance, and 3 or 4 days is even better.


It is really the best homemade crust recipe I have tried. It easy, always comes out great and I usually use only half of it and freeze the rest. Oh, and I never chill it first....I don't usually think that far ahead! But it still is so yummy!! We like our pizza with pesto so we do half and half, which Kady just thinks is so fun.


I use jar pesto because it is cheaper than making homemade. Just add toppings...we use Monterey Jack cheese, olives, sundried tomatoes and fresh tomatoes sprinkled with parmesean and Italian seasoning. And you bake for only 8-10 minutes at 500 degrees. This is the only pizza my kids will eat a lot of! (And if you know my girls you know they need to eat!) It really is an easy way to have great pizza!


Friday, May 4, 2012

My ideal organized kitchen.....

This is what my ideal kitchen looks like.

Pinned Image

This is what my kitchen really looks like. Please don't tell anyone. Do you see why Pinterest is my best friend right now! I knew before I saw that pic that I wanted a more organized space but I didn't know how much.


And here is the finished....well life is a work in progress and so is my home, but this is what I have done so far!


Now doesn't that look much better! I just wish I had white cabinets. But for a rental house in a border town this will just have to do. Although, shelf liners would be a nice touch. In the next house for sure. 


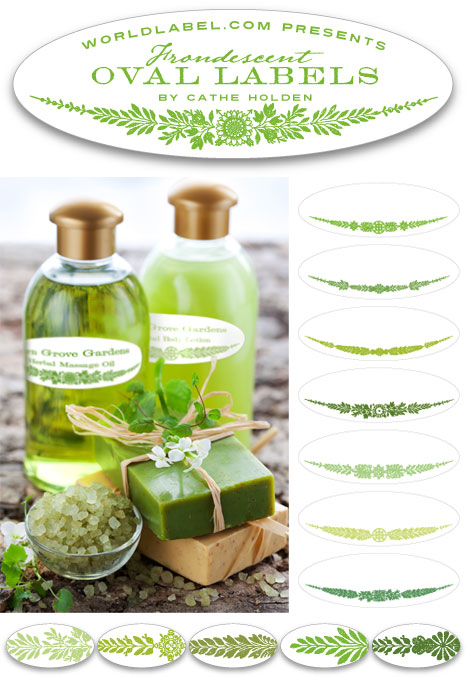
I found these labels here. I edited them, printed on regular white paper and attached with contact paper. I used plastic ware and mason jars to store it all. I thought of using label stickers but I am a messy cook and I thought they should be covered. Also, this was much more thrifty!

Oval Labels


Feathering our nest (well cleaning it first!)

I found Pinterest.....I know, I know....it's about time. I found Pinterest and with it a whole long list of projects I want to start. Actually, I want to finish them. I decided to start this blog with some of these projects. This is my attempt at making our home more peaceful and organized, feathering our nest. But I have to do this is a thrifty way. I am also working on being content. In my mind, being content means savoring every moment of each day and seeing the wonder in God's beautiful world around us. That doesn't equal going out and buying lots of cute decorations from the store (even though that would be fun too!) It also doesn't equal adding to the wasteful lifestyle we can all sometimes lead. So I am attempting to feather our nest in an economical and green way!

The first thing I am going to try is organizing and cleaning. You have to start with a clean house right? I found these products online while searching for organizing and cleaning tips. I have tried every homemade and/or natural product you can find and to be honest....none of them work as well as I would like. With a dirty Army man, two dirty kids and a dirty dog most cleaners don't stand a chance. I actually used these products years ago when I started cleaning houses. They worked really well from what I remember so I reactivated my info and I am trying them again. You can view a video here that was on Rachael Ray...


And then you can click here to learn about all the products.


Healthy Home


So I am going to try them and give an honest review on how they work. It seems ideal....organized, green, economical (they last FOREVER!) and effective (from what I remember!) I ordered a few to try out and I will let you know the results asap!